Create and Apply a Transform
A Transform allows you to change the display of the response from the API. When using a transform, you can:
- Map the following:
- One input to one output
- Outputs only
- Multiple inputs to one output
- One input to multiple outputs
- Only map to the same data type. For example, you can only connect a string property to another string property. If the data types do not match, you will receive an error during Preview.
- Write Apache Groovy code in the Code Editor instead of manually adding transforms.
- Upload JSON/SOAP/XML files for your input/output.
Complete these steps to create and apply a transform:
- In the directory carousel, click the project for which you want to create and apply a transform.
- In the directory, click the application for which you want to create and apply a transform.
- Click the Integrate tab.
- Click the Services sub-tab, and then select the service provider from the drop-down list.
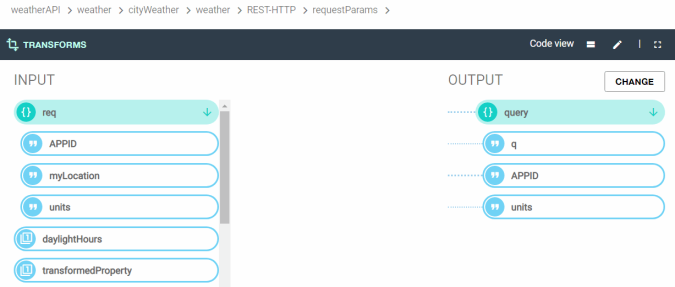
- Click to expand the services until the following screen displays:
- Click the Response Edit icon, and the Transforms screen displays:
Note: If No Input Loaded or No Output Loaded displays, click Load, and then upload a mapping. See Data Mapper for instructions on how to upload a mapping.
- Click the Add button on the output.
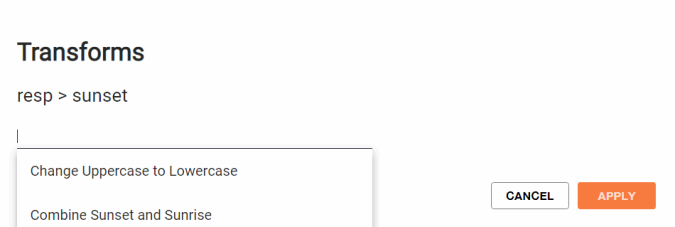
The Transforms dialog box displays:
Note: If there are existing transforms, a list of the existing transforms displays. Click the transform to select an existing one.
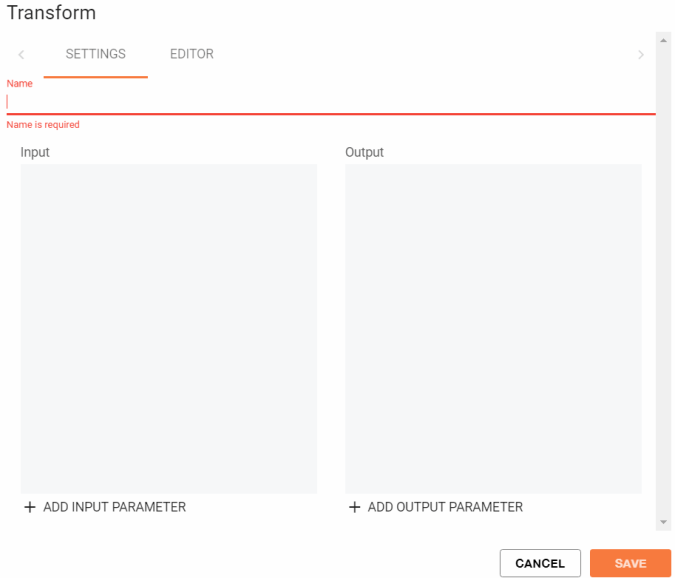
- Click Add New, and the Transform Setting dialog box displays:
- Enter a name for the transform into the Name field.
- Complete one of the following actions:
- To transform one input to one output, click Add Input Parameter, and then click Add Output Parameter.
- To transform one or multiple outputs, click Add Output Parameter for each output.
- To transform multiple inputs to one output, click Add Input Parameter for each input, and then click Add Output Parameter.
- To transform one input to multiple outputs, click Add Input Parameter, and then click Add Output Parameter for each output.
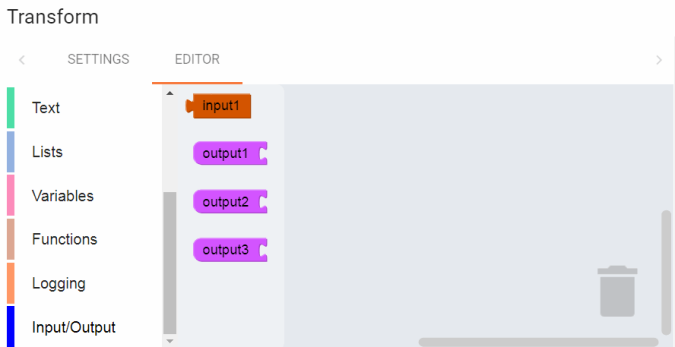
- Click the Editor tab and configure the input/output parameters.
Note: The number of available input/output blocks correspond with your selection in step 10. For example, if you selected one input parameter and three output parameters, you will see the following:
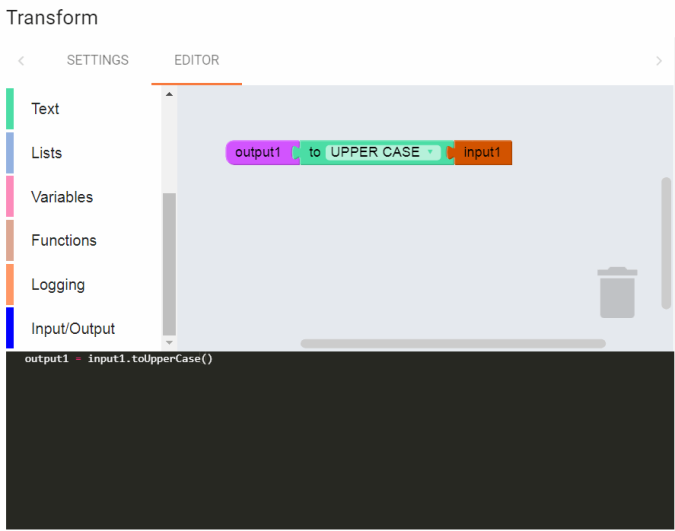
An example expression to transform the output to uppercase is as follows:
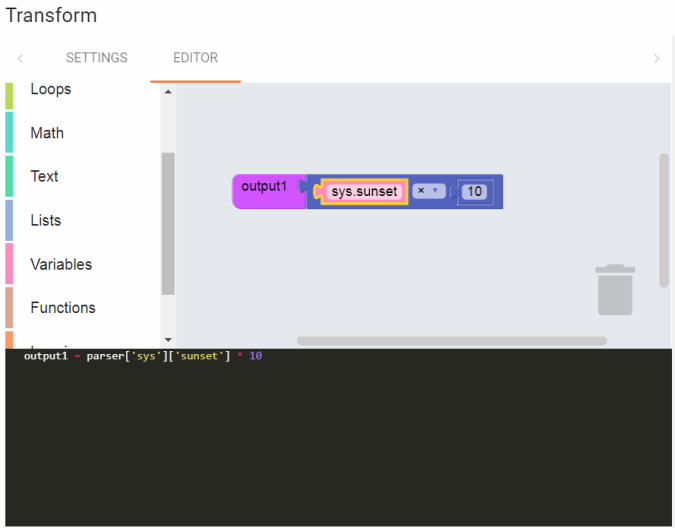
An example expression to transform the output times 10 is as follows:
- Click Save.
- Map the input and output as necessary. See Data Mapper for instructions on how to map an input to an output.
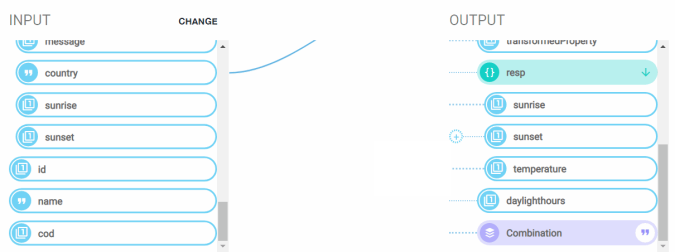
- Click the Add button at the beginning of the output if you are transforming the output only or at the end of the output connection if you are mapping inputs and outputs:
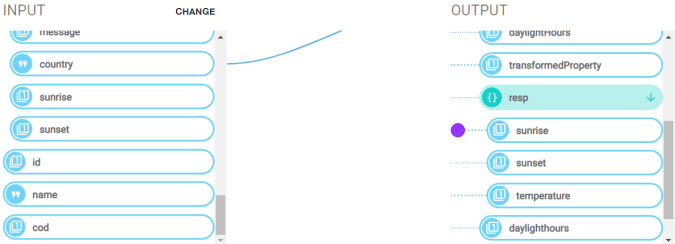
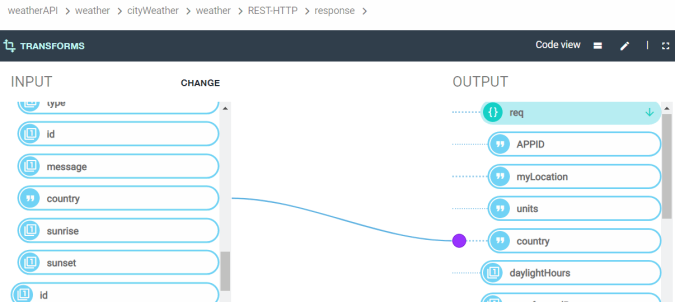
- Click the transform that you created, and then click Apply. The transformed output is now identified with a purple circle.
- Click the purple circle, and the Transforms dialog box displays:
Note: If you are transforming only outputs, you do not need to map the input and output.
The Transforms dialog box displays with the transform that you just created displaying in the existing transform list.
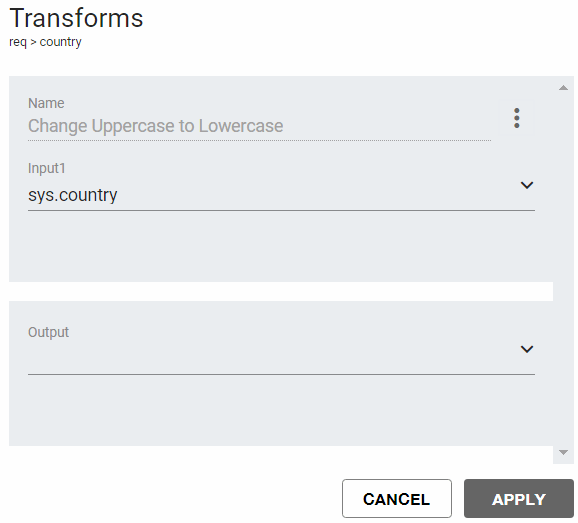
- From the Output drop-down list, select the transform that you created.
- Click Apply.
- Click Save.

